
So let’s learn how to design this wonderful business card template:

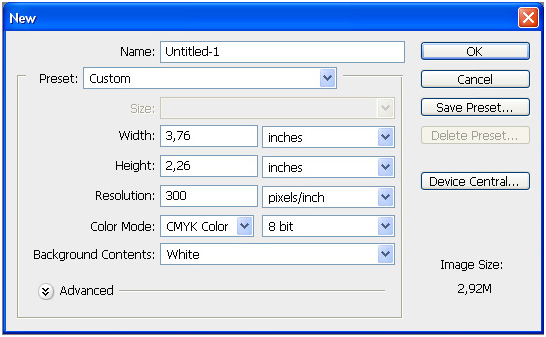
1. Start from creating a new Photoshop document with the following settings:
- Width – 1128 pixels;
- Height – 679 pixels;
- Resolution – 300 pixels/inch;
- Color mode – CMYK Color.
We actually took a 100 pixels wider and higher than a standard business card size, which is:
- 1028 * 579 pixels
- 87 * 49 millimeters
- 3,43″ * 1,93″ inches
2. Now fill the background with black (#000000) color using the Bucket Tool, and add Rulers with Ctrl+R (View – Rules). Move the rulers to set the edges of the future card.

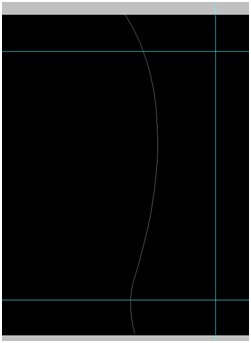
3. Use the Pen Tool (P) to draw two arbitrary curves:

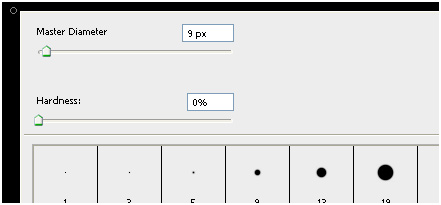
4. Create a new empty layer and take the Brush Tool (B) with the following settings:
- Master Diameter – 9 px;
- Hardness – 0 %.
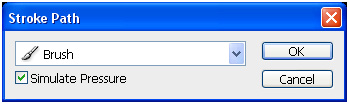
5. Now get back to the layer with the curve. Click the “Paths” tab > right-click “Work Path” > choose “Stroke Path”
Choose “Brush” in the dropdown list and check the “Simulate Pressure” setting.
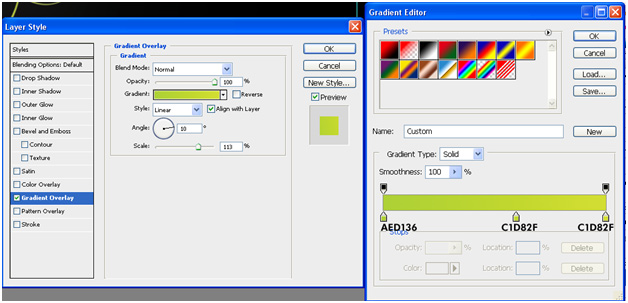
6. Add the “Gradient Overlay” effect to this layer:

Configure it this way:
And the resulting image will look somewhat like this:

7. Let’s add a kind of shine to the background. Create a new layer and place it under the layer with the curve. Use the Brush Tool(B) with the settings below:
- Master Diameter – 400 px;
- Hardness – 100%.

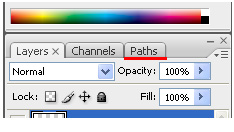
When the shine effect is in its place, make the Opacity of this layer 10%.
8. To add text use the Horizonyal Type Tool (T). I’ve picked the Reobic font for the name, size 62 px, bold, cursive, color – white. The profession is the same font, but smaller size – 24 px (Enhance the text with the same effect as we used for the layer with curves.). E-mail – 18 px and underlined.
And we have our front side ready:

9. Let’s make a new document and repeat all the steps, but with a bit different curve, texts and their placement.
- Company Name – 62 px, bold, cursive, white;
- Slogan – 22px, gradient overlay again;
- URL – 22px, cursive, underlined.
And the back side is ready too:

10. Here’s the final result of this tutorial, enjoy:

Comentarii
Trimiteți un comentariu